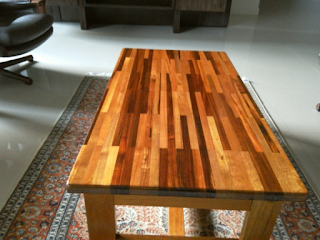
It's February and its time to reveal my second 3Rs project. This time it's a straight forward restoration of a trio of coffee tables. There are two small square tables and a longer rectangular table in this project. They were looking very tired with scratches, burns and watermarks on the finish.
Two of the finished tables have been placed in the living room of the new apartment. The third one has gone into the bedroom as a catchall for my papers and bags. Being a table, I only empty the contents of my pocket onto it. If it was a chair it would probably be draped with clothes.
These tables have been in the family for a long time. I remember them arriving a few days before Deepavali about 30 odd years ago as part of a new lounge set. Mum tells me that it's made from rubber wood but it has this lovely parquet like effect with different coloured timber. My original plan was to sand back the table and legs, give the table surface a few coats of clear varnish and paint the legs a white colour to contrast with the natural finish.
As I was giving the tables a last dusting before painting, I was admiring the grains and patterns on the legs and I had second thoughts about painting it. But I had bought the paint (water based latex) and thought it would be a shame to waste it. So I started painting one side and knew it was a mistake right away. I didn't even let the paint dry. I cleaned it off with a wet cloth and never looked back. I'm really happy I didn't go through with the paint idea as it would have totally ruined the tables.
A few days later I was reading a DIY blog about choosing pieces for restoring and it said to beware of painted furniture as paint is often used to cover up defects or poor materials. I'm so glad Iistened to my inner voice and decided to go with a clear gloss finish as there was nothing to cover up on these babies. I hope you enjoy the before and after pictures and that you too listen to your inner voice.


